A practical guide to clearer AI video sound

How to Use Audio Ducking in AI Videos (Step-by-Step)

Audio ducking helps speech remain clear by lowering background music or other supporting sound while someone is speaking. This guide explains the basic workflow for applying that mix to an AI-generated video, what to check before exporting, and how to avoid common problems such as music masking dialogue. Mootion supports audio as a Smart Reference input, but its supplied feature information does not document audio-ducking controls or a mixing workflow. The clearest approach is to create the visuals, then use an audio or video editor with volume automation to balance the finished sound.

Explore video creation A two-stage workflow: generate first, mix audio afterward.

A product overview video. It is included as a general look at AI video creation, not as an audio-ducking tutorial.

What Is Audio Ducking in AI Videos? (Quick Definition)

Audio ducking is a mixing technique that temporarily lowers one audio layer—often background music—when a more important sound, such as narration or dialogue, is present. In an AI video workflow, it is a finishing step for balancing generated or selected audio with speech, rather than a way to generate the video itself. It is useful for explainers, lessons, product videos, and story-led clips where the words need to stay easy to hear.

How Audio Ducking Fits Into an AI Video Workflow

Separate what the video generator supports from what you do in an audio mixer. The available Mootion information describes audio reference input and video-creation modes, but does not describe ducking settings.

Instant Mode and Smart Reference

This video promotes Instant Mode and Smart Reference for image, video, and audio inputs. Instant Mode creates a video directly from a prompt, with a stated maximum length of 15 seconds. The supplied information does not say that Smart Reference adjusts audio levels or applies ducking.

A cinematic example with dialogue and music

“Aliens Arrival” is a supplied example that includes dialogue and music. It can help you think about the relationship between spoken lines and a soundtrack, but it is not documented as a demonstration of ducking controls.

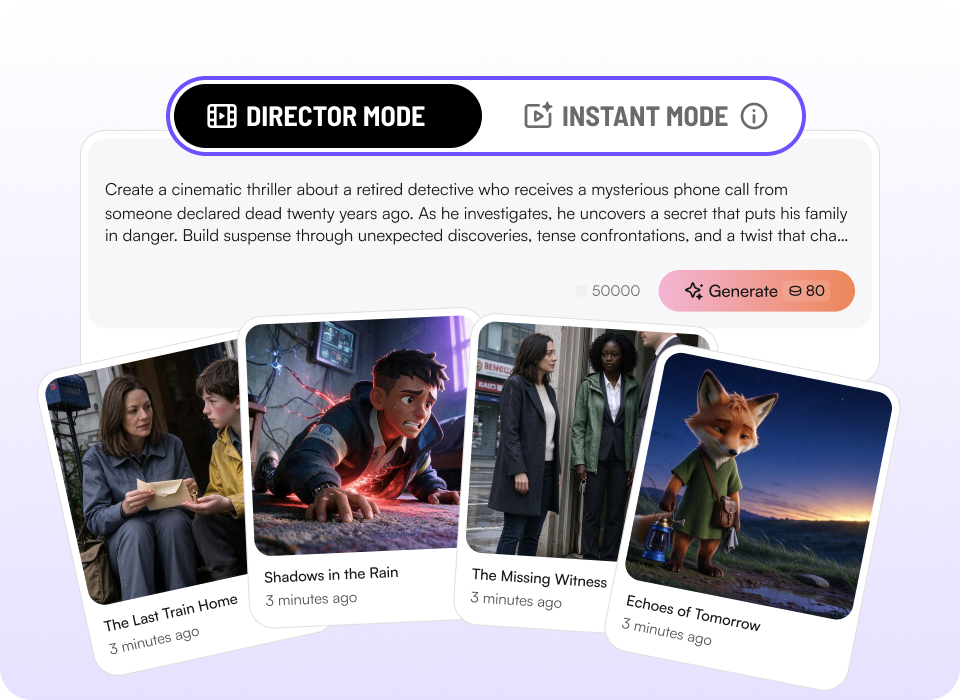
Illustration of Instant Mode and Director Mode options for AI video creation

Choose a visual creation mode

Use Instant Mode when starting from a prompt or Director Mode for storyboard-based video creation. For sound balancing, plan a separate finishing pass in an editor that offers audio-level automation. Learn about prompt-to-video workflows and storyboard scene planning.

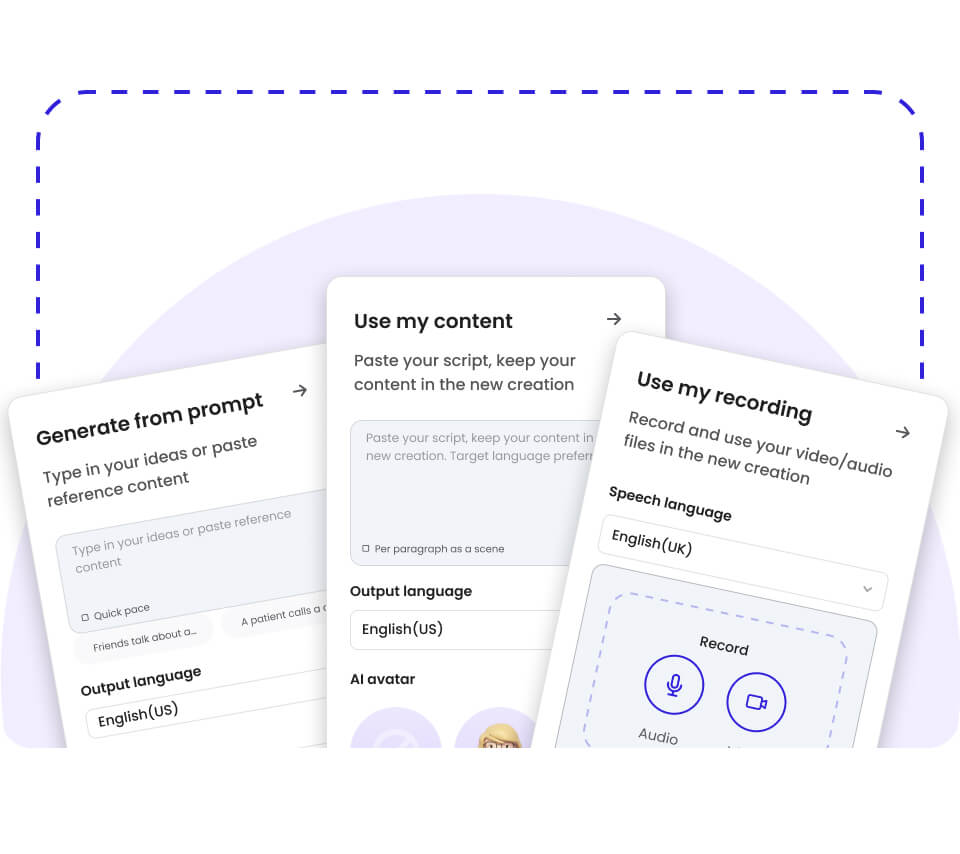
Illustration showing prompt, existing content, and recording as ways to begin a video workflow

Keep the input and the mix distinct

Mootion’s Smart Reference supports audio uploads alongside images and videos, but the available details do not specify volume controls for uploaded audio. For context, see audio reference inputs and audio-to-video creation.

Quick Answer (Do This First)

  • Generate or assemble the AI video and decide which sound should remain most prominent.
  • Download the finished video from the platform if you are using Mootion; video downloads are supported.
  • Open the video in an audio or video editor that supports separate audio tracks and volume automation.
  • Keep dialogue or narration at a clear, steady level before adjusting the background sound.
  • Lower the music during spoken sections and let it return during pauses, using gradual changes rather than abrupt cuts.
  • Listen to the full result on headphones and speakers, then adjust any section where speech is difficult to understand.
  • Export a review copy and watch it once more with the final audio mix.

Prerequisites (What You Need)

  • An AI-generated video file or a video project ready for sound finishing.
  • The dialogue, narration, music, or other audio that should be part of the final mix.
  • An audio or video editor with track-level volume automation.
  • Permission to use the video and any audio assets included in your project.
  • Headphones or speakers for checking speech clarity and sound balance.

Mootion’s documented capabilities are useful for the video-generation stage: Instant Mode supports prompt-based creation and Smart Reference inputs, while Director Mode supports storyboard-based creation. The available feature information does not list a native audio-ducking control.

Step-by-Step: Use Audio Ducking in an AI Video

Step 1: Finish the visual video first

Create the scenes and review the visual sequence before working on the mix. If using Mootion, select Instant Mode for prompt-led creation or Director Mode for a storyboard-based workflow; neither mode is documented here as an audio-ducking mixer.

Success: The video plays in the intended scene order and is ready for sound finishing.

Common mistake: Do not treat an audio reference upload as proof that the platform has mixed or ducked the sound.

Step 2: Identify the foreground audio

Decide which sound needs priority during each moment, such as a voiceover, dialogue, or an important sound cue. Mark the sections where it should be easy to hear before adjusting background music.

Success: You can identify the important spoken or featured moments that need space in the mix.

Common mistake: Avoid lowering every sound layer without first deciding which one carries the message.

Step 3: Open the video in an editor with volume automation

Download the video and open it in an editor that lets you adjust audio volume over time. Keep speech and background music on separate tracks when your editing workflow allows it, so each can be adjusted independently.

Success: The editor shows the video and the audio layers you need to balance.

Common mistake: If speech and music are already combined into one audio track, check what your editor can separate before making level changes.

Step 4: Lower background sound under speech

Use volume automation on the background layer to reduce it while dialogue or narration is present. Make the change gradual enough to sound natural, and bring the background level back up when the foreground audio stops if that suits the scene.

Success: Speech is easier to follow while the supporting sound remains present but less prominent.

Common mistake: Avoid abrupt level changes that call attention to the mix instead of the story.

Step 5: Listen through and export a review version

Play the complete video, including the transitions between speech and pauses. Check that no important words are masked and that the music does not disappear unexpectedly, then export a review copy and listen to it outside the editing timeline.

Success: Dialogue remains understandable throughout, and changes in background level feel intentional.

Common mistake: Do not approve the mix based only on a short preview of one scene.

Validation Checklist (Make Sure It Worked)

  • ☐ The dialogue or narration is understandable during every spoken section.
  • ☐ Background sound is lower while the foreground voice is speaking.
  • ☐ The background returns at a level that suits the pauses and transitions.
  • ☐ Volume changes sound gradual rather than distracting or abrupt.
  • ☐ No important words or sound cues are hidden by music.
  • ☐ The complete video has been reviewed, not just a single scene.
  • ☐ The exported review copy plays with the intended audio mix.

Common Issues & Fixes

Problem Likely cause Practical fix
Dialogue is hard to hear Background sound competes with the voice. Lower the background during speech and replay the whole passage.
Music changes sound abrupt Volume automation changes too quickly. Use smoother transitions into and out of the reduced-volume section.
Background does not dip The adjustment was made to the wrong track or not applied over the speech section. Check the selected audio layer and verify the automation across the relevant timeline.
The audio cannot be adjusted separately The available file has speech and music combined into one track. Check whether your editor offers a suitable separation workflow, or revise the mix from separate source tracks if available.
The mix sounds different after export The final rendered file has not been checked outside the editing view. Play the exported review copy and make any necessary level changes before finalizing.

Best Practices (Do It Right Long-Term)

  • Choose the foreground sound before mixing — it gives every volume adjustment a clear purpose.
  • Keep speech and background sources separate when possible — independent tracks are easier to balance.
  • Use gradual level changes — smoother transitions are less likely to distract from the content.
  • Review the entire video after editing — audio relationships can change from scene to scene.
  • Listen on more than one playback setup — this helps reveal mix issues that are easy to miss in one environment.
  • Save a review copy before treating a mix as final — it gives you a chance to catch export differences.
  • Keep generation and mixing expectations distinct — audio reference input does not, by itself, confirm ducking support.

For projects with recurring characters or story sequences, consider how consistent AI video characters and voiceover and music planning fit into your production process.

Recommended Tool (Optional): Mootion

Mootion can support the video-generation part of a project. Its supplied information describes the following capabilities; it does not document audio-ducking controls or a built-in mixing workflow.

  • Start with a prompt in Instant Mode for direct video generation.
  • Use Director Mode for storyboard-based video creation.
  • Use Smart Reference with audio, images, and video as reference inputs.
  • Use a reusable Character Library to support character continuity across projects.
  • Download the generated video and complete audio-level adjustments in an editor that supports volume automation.

Use it when you need to create video scenes from prompts or references; do not choose it specifically for audio ducking without verifying that the control you need is available.

FAQs

What is audio ducking in AI videos?

Audio ducking is a sound-mixing technique that lowers a background audio layer while a more important sound is playing. In an AI video, this commonly means reducing music under dialogue or narration. It is generally a post-production mix adjustment, separate from generating the video scenes.

Does Mootion have a documented audio-ducking control?

The supplied Mootion feature information does not document an audio-ducking setting or audio-mixing workflow. It does describe Smart Reference as supporting audio uploads alongside image and video inputs. For ducking, use an audio or video editor with volume automation after creating the video.

Can Smart Reference automatically lower music under speech?

The available details describe Smart Reference as an audio, image, and video reference-input capability. They do not state that uploaded audio can be ducked, mixed, or adjusted in volume. Treat the feature as an input option, not as confirmation of a sound-mixing control.

What is the simplest way to duck music under narration?

Place narration and background music on separate tracks in an editor that supports volume automation. Lower the music during spoken sections, use gradual transitions, and listen through the complete video before exporting. Check the exported version as well as the editing preview.

Does Mootion have a free plan?

Mootion is not presented in the supplied information as having a free plan. The listed Standard option is $15 per month when billed monthly, with a yearly option listed at $12 per month billed annually. Check the pricing page for current plan details.

Conclusion

Audio ducking can make an AI video easier to follow by reducing background sound while speech takes priority. The practical workflow is to create and review the video, then use an editor with volume automation to shape the mix and check the exported result. Mootion’s supplied information covers audio reference inputs and video-creation modes, but not a ducking feature, so plan audio mixing as a separate step. To explore the video-generation workflow, visit the creation workspace.